Sunday, November 20, 2011

Giving Thanks

"


This Thanksgiving…

When you dress in your holiday finery, remember there are those who must wear rags.

When you sit in your cozy and comfortable homes, remember there are those who shiver in the cold.

When you sit down at the dining room table, remember there are those who have no table, no chair and no dining room. 

When you are eating your turkey with all the trimmings, remember there are those who hunger and whose plates will be empty.

When you enjoy the company of friends and family, remember there are those who are all alone.

And after the feast is over and it’s time for bed, remember as you slip under the crisp sheets, there are those whose only bed is a pallet on the cold, hard, ground. 

Be thankful for the simple things we all take for granted.  And if you think you have it bad, remember there will always be those who wish they had it that bad.


"I cried because I had no shoes till I met a man that had no legs."
anonymous

Happy Thanksgiving 


Thursday, November 17, 2011

A little paint + brown paper bag = an adorable stuffed Santa star ornament


Money is tight...everywhere, plus just about everyone is into recycling these days, so what do you if you and the kids would like to create some cute home made ornaments for the tree?  Get your groceries in a brown paper bag and you will have the main supply for creating a ton of these cute little stuffed Santas.  Add some supplies you may already have on hand and these little ornaments are pretty much cost-free.

You will need:

Brown paper bag

Acrylic paint in red, white, flesh, black and gold

Acrylic varnish

Tacky craft glue

Small and medium sized paintbrush

Gold thread (for hanging)

Paper towels and newspaper to protect work surface

Small amount of fiberfill for stuffing.

Optional:  tiny pompom and gold glitter pen


 1.  Cut open the paper bag.  Crumple the paper.  Working on the unlabeled side, re-flatten the paper and cover with a coat of red paint.  Let dry.


 2.  Thin some black paint with water and apply over the red paint wiping as you go.  Some of the black will remain in the wrinkles aging and giving the paper a leather-like look.  When dry apply a thin coat of varnish.  Let dry.


3.  Use the star pattern to cut out two stars for each Santa.  On one star paint the Santa as shown in the photos and let dry. 


Star pattern, click and print full size

Cut two stars

Paint the boots and trim

Paint a U-shape for face in flesh and white trim above

Paint white trim on sleeves

Paint white around face for beard

Paint a black stripe across for belt

Add white trim down center and above belt

Paint square shape in center for buckle

Add two blue eyes

Add black for pupil, red nose and lips 


4.  Apply a line of glue all around the unpainted side of the other star leaving the top point (where Santa’s head will be unglued.  This is where you will add the stuffing.  Line up the stars and press together.  Glue a 6-inch thread to the back inside for hanging before you stuff. 


5.  When the Santa is dry, add bits of stuffing in the body of the Santa.  A pencil or the end of a paintbrush helps to push the stuffing into all the points of the star evenly.  Add some glue around the top and attach.  When dry you may add a small pompom to the top of Santa’s hat or you can just add a dab of white paint.

Step by step painting instructions make this project easy peasy!


Tuesday, November 15, 2011

Mirror, mirror on the wall, my favorite art supply


What is your very favorite art supply?  Is it a special brush, or a color?  Could it be that you just love a certain medium and no other?  Perhaps your favorite art supply is a certain kind of paper?

We all have favorites, but ask me and I will tell you my favorite art supply is... a mirror!  Yes, you read it right, a mirror that I have hanging in my studio.  No, it’s not there to admire my beauty.  It’s not there to check out weather I have applied my makeup without any lines of demarcation. It's not there to ask it who might be the fairest of them all.  It is a tool I use to see what my eyes cannot see straight on.

Whenever I am painting something and something just feels wrong, I simply hold it up to the mirror and all of a sudden, like magic, it becomes transparent to me.  I see where it may need touching up, or adjusting.  I have been doing this since I was little and don’t ask me how I discovered it because I have no idea.  Try it and you will be amazed and will soon be hanging a mirror in your own studio! (If you haven’t already)


Friday, November 11, 2011

“Wanna come over and see my etchings?


Wanna see my etchings?

Holly design

 Who would believe such a line when it’s such a cliché?  But when I was young and oh so naïve believe it or not I fell for that very line.  Considering that I’m an artist I jumped at the invitation to enter the lion’s den in order to view his non-existent collection of etchings. 

After running around the couch 6 or 7 times I made a hasty retreat a bit wiser but fortunately no worse for wear.  Am I less naïve?  I don’t know, but please don’t try and sell me a bridge in Brooklyn.

My husband and I will be celebrating our 11th anniversary on Saturday.  12 years ago he knew that he didn’t need any tired old lines. He knew... Dare I say it?  Oh what the heck…”He had me at hello.”  Groan....

Years later…I am etching.  Acid etching that is, on recycled melted down at a very high temperature wine bottles to create original and unique holiday cheese trays.  My technique is quite simple…I wire and bead the neck and then etch an original design onto the glass.


I know it’s not paint, but it is art and since I haven’t participated in PAINT PARTY FRIDAY for a while due to other obligations…I figured I would join in once again.

look closely to see the etch

Wednesday, November 9, 2011

Fall…. into winter?


Every notice how some years the leaves are just so beautifully colored in the fall that it takes your breath away.  I am sure there must be a scientific reason for this abundance of reds, yellows, orange and maroons, but if there is I am not the one who knows it.

Of late the weather here in the Old Dominion is absolutely gorgeous.  The skies are bluer than blue and the leaves are simply awesome.  So, almost daily, after I complete my overwhelming list of chores, I grab little Maddie (my Jack Russell Terrier) and head out down a rustic trail with camera in hand.


I snap a few photos of the great blue heron, almost step on a toad…and a venomous copperhead snake but enjoy every breath I take.  I arrive home, refreshed and renewed.


When I return home I step onto my back deck and spy some more autumn color.  I snap yet another photo.  Later, as I check out the photos, I realize that just beyond the gorgeous yellow leaves tinged with red is the hint of winter and holidays to come.


Do you see it???  

Monday, November 7, 2011

Country mouse vs. City mouse


Paula Deen


I am good cook.  No, let me toot my own horn a bit more, I am a great cook.  I can throw things together and make just about anything taste good.  So it’s no surprise that this weekend I attended the metropolitan cooking and entertaining show in Washington, D.C.

While there we got to see the fantastic country cook, Paula Deen.  Now, I consider myself a southerner, but if I say it in front of my husband, who is from Long Island, N. Y., he will always pipe in with the fact that I wasn’t born in the south but New Jersey of all places.  It doesn’t matter that I have lived almost my entire life in the South; I am a northerner in his eyes.  And yes I have relatives that speak with a New Yawk accent!

No matter what he says, though, I am no stranger to southern cooking.  My first husband, Jerry, who died in a car accident, was born and raised in the south. (Thus passing my husbands criteria of a true southerner)  Jerry’s whole family was just like Paula Deen, boisterous, fun and incredibly good cooks.  Good country cooking subscribes to the theory of waste not--want not.   Country folk used what they had.  They had to grow their own food, raise livestock, and churn butter…and they used it-- liberally.  They were not fat because they worked hard.  And they all lived to ripe old ages.

So I consider myself lucky.  In my life, I have experienced the cuisine of the north and the south.  I have had knishes and Italian ices and I’ve have had hominy (not grits) cooked with sausage, corn pudding, and fresh churned butter, and fortunately for me, I am not fat.


What kind of regional foods do you like?  Are you a country mouse or a city mouse?

Thursday, November 3, 2011

The shoe that broke the closets back


“When it rains it pours.” 

“The straw that broke the camel’s back.”

We’ve all heard these old adages a million times in our lives but how many times do we actually live them?

We all know that there is a limit to everything, even closets.  What in the world can I be referring to?

The past few weeks have been exhausting.  I am getting ready for a big Art and Craft show this Saturday, my husband and I have both been sick with sinus infections, and work and laundry waits for no one. (The latter is a Crystal-adage)

Before taking a load off I noticed a stray shoe haphazardly shed in my pre-antibiotic delirium.   I mindlessly bent over, picked it up and put it on the upper closet shelf.  How was I to know that this simple little shoe would become that proverbial straw?

I went downstairs and sat down to take in a bit of television. 

“CRASH.”  “BANG.”  “BUMP.”

Was it the cat?  The dog?  Both were sleeping peacefully, one on the ottoman and the other in the Laz-e-boy.  My husband who had been sparring fruitlessly with his P.C. in the bedroom came rushing downstairs to tell me the closet had collapsed. 

“Are you kidding me?” 

Even so, I was totally unprepared for the sight I was to see. (The photo is a after picked up one and does not do justice to the actual event)  It looked as if…yes, it looked as if we had experienced a much stronger earthquake than last summer’s event.

And at that moment, while I stood there in bewilderment, I lived out the second adage.  The phone started ringing, and it was a woman who was trying to reach my brother who had left his cell phone at the bowling alley.  I tried to sound normal, helped all I could and hung up the phone only for it to start ringing again.  This time, my daughter was on the line saying a light in her kitchen had exploded and what should she do.  (You know I couldn’t make this stuff up right?)  I hung up and again it was the phone insisting to be answered, almost as if it was mocking me.  This time a phone solicitor…need I say more?

After picking up clothing, shoes, boxes and other storage items and putting them in the spare room till my closet gets a facelift, I realize as I lay me down to sleep that my life, is in actuality a situation comedy.  Anyone up for “Everybody loves Crystal”?


Tuesday, November 1, 2011

How to make mini origami shirt earrings


Lightweight and colorful, these earrings are easy and inexpensive to make.  Try your hand at the age-old art of origami.  I’ve tried to include plenty of photos…alas, hubby wasn’t around so I had to take them with one hand…click to enlarge for a better view.

You will need:

Origami paper (available at craft stores)

1 ½” head pin (gold or silver color as preferred)

Fishhook ear wires to match head pin

Needle nosed pliers, wire cutters

Scissors, ruler, tacky craft glue

Seed beads or tiny sequins


1. For each pair of earrings cut 2 rectangles 3 “ x 1 1/2”


2.  To make an origami shirt, fold the paper in half lengthwise.  Fold each side to the center fold line.  Turn over


3.  Fold top down 1/8” inch. Turn over.


4.  Fold each corner inward at an angle.  This represents the collar.


5.  Fold up the bottom end about ½” inch, crease.  Fold again to meet the top collar edge and tuck under color.  Shirt is made minus the sleeves.

FOLD THE SLEEVES:


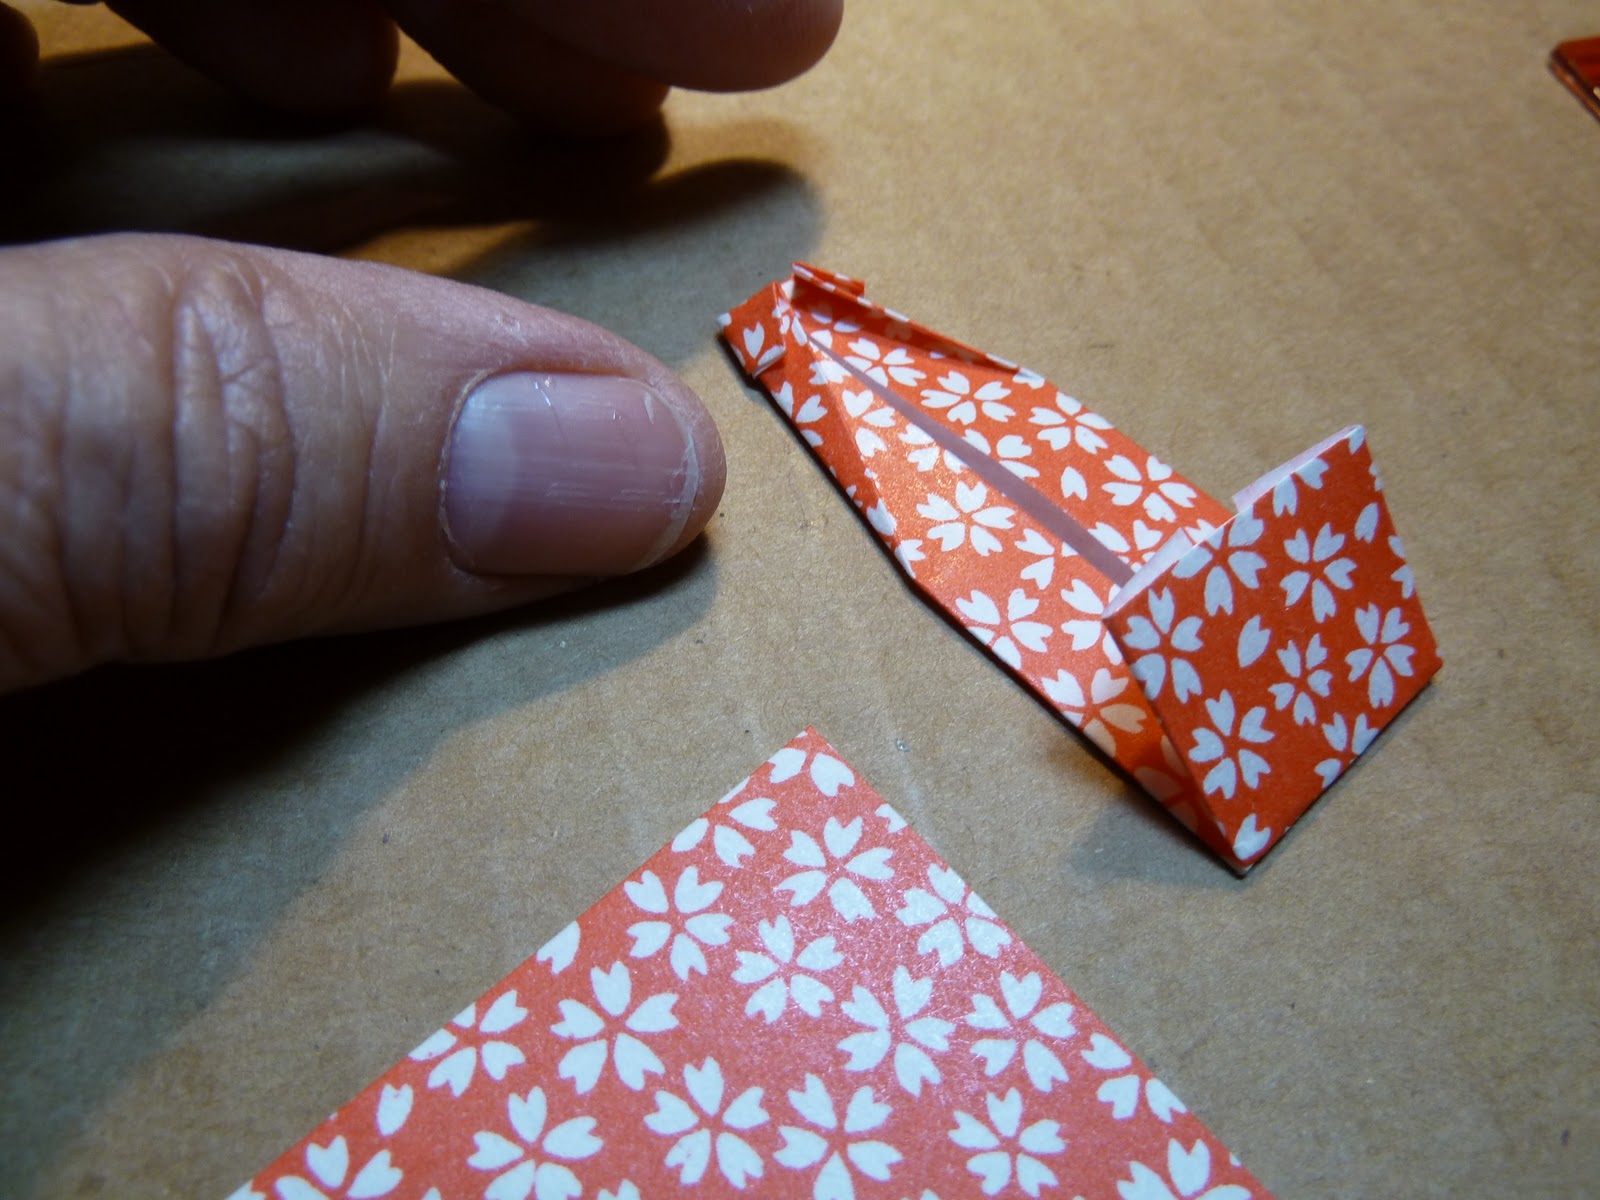
This is how sleeves look inside when you open what you folded


6.  To make the sleeves…this is the only tricky part:  Reopen the shirt  at the bottom fold and pull out the corner edge a little bit and press down.  It will resemble a sleeve.  Refold back to shirt shape and smooth and crease all folds tucking bottom edge back under collar.


7.  To add the jewelry findings reopen the folds again and on the fold closest to the top poke a head pin in the center.  Add a bit of glue (This insures it will not open anymore) down the line of the head pin and refold, tucking securely under the color. Glue on a couple of seed beads or sequins for buttons.  Let dry completely.


 8.  When dry, trim the head pin to allow about an 1/8 of an inch coming out of the collar.  Using the needle nosed pliers bend to the left, then bending to the right to almost but not quite form a ring, slip on the fish hook ear wire making sure it is facing in the correct direction.  Continue bending until the edges close.


9.  Follow the steps to make the other earring.

HINT:  If you have trouble making the sleeves just leave them off.  The shirt still looks cute without sleeves.


Related Posts with Thumbnails